

How to Make Bone Broth (3 Simple Ways!)

How to Make Bone Broth (3 Simple Ways!)

Learn how to make bone broth at home with simple steps. A nourishing recipe for gut health, immunity, and rich flavor in soups, stews, and sipping
Recipe Ingredients:
This post contains affiliate links. Please see our disclosure policy.
Love Kettle & Fire bone broth but want a more affordable, homemade version? Learn how to make bone broth with the same rich flavor and gut-healing benefits in your kitchen, for a fraction of the cost! Whether you're sipping it for collagen or pouring it into soups or sauces, this nutrient-dense broth is packed with flavor and clean ingredients. Plus, it's easy to customize using beef, chicken, or leftover bones from your freezer.

Table of Contents
One of the simplest things you can do for your family's health is learn how to make this homemade bone broth recipe. Broth is the base of so many delicious meals, like soups, sauces, casseroles, and rice. It's easy to grab a carton of chicken broth from the store, but once you learn about bone broth benefits for your health, there's no going back to store-bought.
I started making instant pot bone broth several years ago, after a long season of making vegetable stock. This probably comes as no surprise to, well, anyone, but making broth out of meat and bones makes your food taste better.
Like, a lot better.
Compound that with how easy it is to make and the innumerable benefits of bone broth for gut health and immunity, and I started putting it in everything. Even things that didn't need bone broth got a dash of bone broth.
Now, I'm here to teach you to do the same thing: make collagen-rich bone broth that will nourish your family from the inside out while you sit back and bask in their compliments.
Homemade Bone Broth Vs. Traditional Broth and Stock
The two main differences between bone broth and traditional meat broths and stocks are the ingredients used to make the broth and the nutrients it contains.
Here's a quick rundown of each:
Broth is primarily made with meat (sometimes including a few bones), vegetables, and seasonings. The cook time is relatively short (about an hour) and is more heavily seasoned. The consistency is rather watery and is preferred by many for soups and sipping.
Stock is made with meat, bones, and vegetables. It cooks longer, about 4-6 hours, and has a deeper flavor profile due to the bones and connective tissue. Thanks to the gelatin found in meat bones, stock's texture is thicker than broth.
Bone broth is similar to stock in that it contains bones, but it is simmered for a considerably longer period. The long cook time, often 12-14 hours or more, is essential for maximizing flavor and extracting crucial nutrients from the bones and connective tissue you wouldn't get otherwise.
Collagen-rich bone broth has ancient roots, dating back thousands of years across many cultures. Early hunter-gatherers boiled animal bones to extract the maximum nutrients, using the broth for sustenance and healing purposes. In Traditional Chinese Medicine, it is valued for strengthening the kidneys and supporting life energy, or "qi." Similarly, the ancient Greeks praised its restorative powers, and it became a staple in Jewish households, known as "Jewish penicillin" for treating colds.
Over centuries, bone broth evolved into a culinary and medicinal staple, prized for its collagen, minerals, and flavor. It has resurfaced in popularity among health enthusiasts and home cooks, valued for its benefits to gut health, joint support, and overall nourishment.
Benefits of Learning How to Make Bone Broth
We could talk about the health benefits of bone broth all day long. It's a natural source of collagen, gelatin, amino acids (such as glycine and proline), and minerals like calcium, magnesium, and phosphorus.
Did your ears perk up when you heard "collagen"? I'll bet they did. Collagen has been on the beauty industry's radar for decades due to the youthful lift it provides to the skin.
One of its most well-known benefits is support for joint health. The collagen and gelatin in bone broth can help strengthen joints, reduce inflammation, and improve mobility. It's also believed to support healthy skin, hair, and nails by boosting the body's collagen levels. For gut health, gelatin can aid digestion by repairing the intestinal lining, making it beneficial for those with leaky gut syndrome or digestive disorders.
Bone broth may also support immune function. The amino acid glycine has anti-inflammatory and calming properties, which may improve sleep and reduce stress. Furthermore, its rich nutrient content helps replenish electrolytes, making it a hydrating and restorative option, especially during illness or recovery.
You've probably seen cartons of collagen powders and supplements marketed by the health and wellness industry. Why not just take one of those instead of fussing with all these bones?
Quality collagen supplements can be great for joints and skin, but only bone broth provides the complete amino acid profile. The amino acids in bone broth-glycine, proline, glutamine, and arginine-offer numerous health benefits.
Glycine supports better sleep, detoxification, and collagen production. Proline aids tissue repair and strengthens joints and skin by boosting collagen synthesis.
Glutamine promotes gut health by supporting the intestinal lining and fueling immune cells.
Arginine helps reduce inflammation, supports cardiovascular health, and enhances wound healing through improved circulation. These amino acids contribute to joint integrity, digestive wellness, immune function, and skin elasticity.
Ingredients and Tools for Making homemade Bone Broth
The beautiful thing is that you don't need fancy equipment for this recipe. You can use either:
- Stovetop and stockpot
- Slow cooker
- Instant pot
For ingredients, all you need are:
- Bones
- Water
- Apple cider vinegar with the mother
Optional ingredients:
- Herbs
- Vegetables
For optimal nutrition, the majority of your pot should consist of bones. If you have vegetable scraps like onions, garlic, celery, or carrots you'd like to add, great! If not, don't sweat it.
Just a tablespoon or two, added before simmering, is enough to aid in this process without altering the flavor. ACV may also support digestion and add a subtle tang to the broth. Using raw, unfiltered ACV with "the mother" provides enzymes and beneficial bacteria, adding to the broth's gut-health benefits.
How to Use This Bone Broth Recipe
This broth couldn't be simpler or more delicious to incorporate into your family's life. Any recipe that calls for broth or stock can be swapped 1:1 for delicious, gut-healing bone broth. That means soups, stews, sauces, rice, casseroles, and gravy can all be effortlessly transformed into a nutrient-dense meal!
A few of my favorite ways to use bone broth are in:
The best part is nobody will know.
This won't be like when you tried blending okra into spaghetti sauce to trick your kids into eating vegetables.
You'll sit back and watch your family devour your meal to a chorus of praise. Undoubtedly, someone will say, "Wow, this was better than usual. Did you do something different?"

FAQs
Should I roast Bones for Bone Broth?
Yes, roasting bones for bone broth is optional, but it does have benefits, depending on what you want from your broth. Here's a breakdown:
Benefits of Roasting Bones
- Deeper, richer flavor
- Roasting bones at 400°F (200°C) for 20-40 minutes caramelizes natural sugars and browns the proteins, creating a more complex, savory flavor-often called "brown broth."
- Richer color
- The broth will be darker and more visually appealing.
- Better for beef, pork, or lamb
- Roasting is especially popular with red meat bones, giving a beefy depth.

What are the Benefits of adding Apple Cider Vinegar to Bone Broth?
Adding apple cider vinegar (ACV) to bone broth is a common practice because it helps extract nutrients from the bones, particularly minerals like calcium, magnesium, and phosphorus. Here's a detailed breakdown:
- Acid helps break down bones
- ACV is acidic, and adding a small amount (usually 1-2 tablespoons per gallon of water) helps dissolve the minerals in the bones into the broth.
- This makes the broth more nutrient-dense, especially in calcium and magnesium.
- Improves gelatin extraction
- The acid also helps release collagen from connective tissues, which turns into gelatin as the broth cools. Gelatin gives broth its body and is good for gut health, joint health, and skin.
- Enhances flavor
- Even though most of the vinegar's tang dissipates during cooking, it can subtly enhance the depth of flavor in your broth.
- Optional but beneficial
- You don't have to use ACV, but without it, the extraction of minerals and collagen may be slightly less efficient.


What is the thick layer on top of my broth?
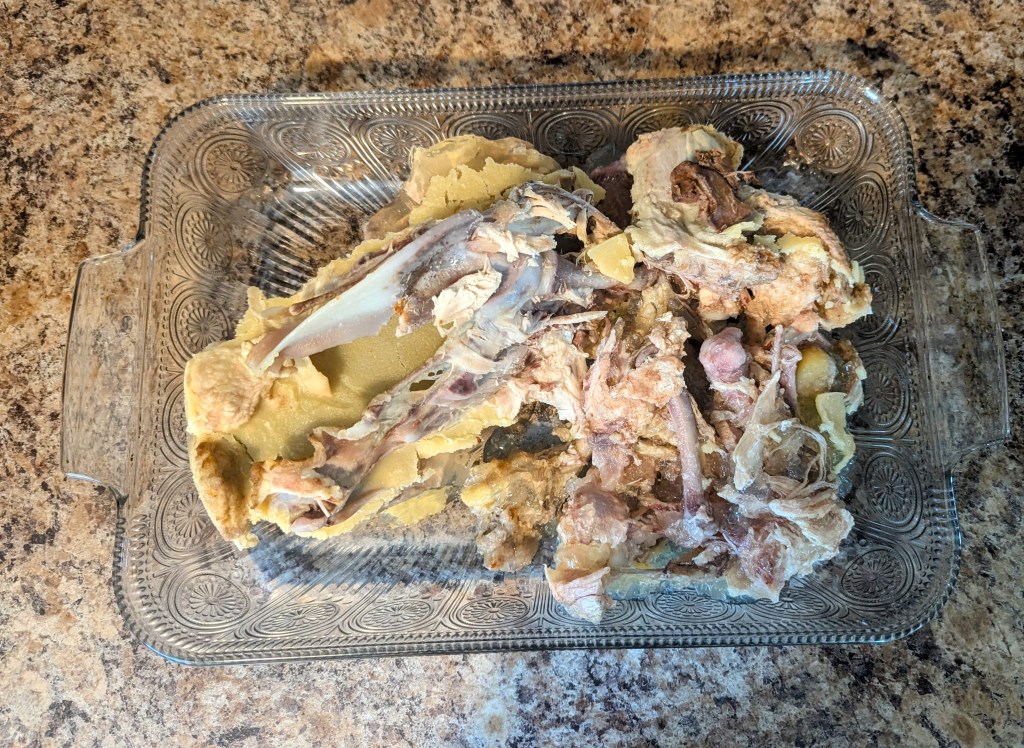
The thick layer on top of your broth is primarily solidified fat that has risen to the surface during cooking and cooling. This fat is released from the bones and any remaining meat as it simmers in the broth.
Why did my broth congeal after cooling?
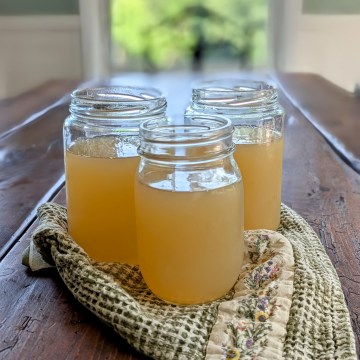
Bone broth congeals after cooling because of the gelatin released from the bones and connective tissue. If your broth congealed, congratulations! You successfully made a nutrient-dense broth perfect for sipping and simmering into all your favorite recipes.
Why didn't my broth congeal after cooling?
If your broth did not congeal after cooling, you probably added too much water. Don't worry; your broth will still be delicious and contain many powerful nutrients, but it will be more diluted than if you used the recommended amount of water.
What kind of bones are best?
You can successfully make this with any bones, but for the best results, use an assortment of marrow bones, knuckles, joints, cartilage, and any other part of the carcass.
For a budget-friendly broth, I typically use the carcass of a whole roasted chicken, along with the neck and any organs that came with the bird.
Why should I skim off the foam?
Skimming off the foam during the first hour of simmering helps improve the broth's clarity, taste, and overall quality. The foam comprises coagulated proteins, impurities, and blood residues released from the bones, especially if not pre-roasted or blanched.
Skimming your broth will yield:
- Better flavor: Leaving the foam can produce a slightly bitter or metallic taste.
- Cleaner appearance: Skimming helps produce a clearer, more appetizing broth.
- Longer shelf life: Removing impurities may reduce spoilage and extend the broth's freshness.
What do I do with the bones after Making Homemade Bone Broth?
Bones should typically be discarded after making broth. If you have a grinder, you can grind the bones to add to compost or feed to pets.
Do not feed whole, cooked chicken bones to dogs. Whole softened bones can splinter and cause internal injuries and choking.
How to Make Bone Broth

Equipment
- 1 Instant pot
- 1 Slow cooker
- 1 Stock pot or large pot
Ingredients
- 1 pound Bones
- 2 tablespoon Apple cider vinegar with the Mother
- Vegetables and/or herbs (optional)
Instructions
For the stove top
- Roast bones at 400°F (200°C) for 30-45 minutes for deeper flavor (optional).
- Place bones and all ingredients in a large stockpot. Add vinegar and cover with cold water.
- Let it sit for 30-60 minutes (cold) to begin the mineral extraction.
- Bring to a boil, then immediately reduce to a very low simmer. Skim off any foam/scum during the first hour.
- Simmer for 24 hours.
- Remove solids, strain the broth through a fine sieve or cheesecloth. Cool and store in the fridge (up to 5 days) or freeze (up to 6 months).
For the slow cooker
- Roast bones at 400°F (200°C) for 30-45 minutes for deeper flavor (optional).
- Place bones and all ingredients in a large stockpot. Add vinegar and cover with cold water.
- Let it sit for 30-60 minutes (optional) before turning on the heat-this helps with nutrient extraction.
- Cover and cook on low for 48 hours.
- Skim foam during the first few hours, though slow cookers produce less.
- Remove solids and strain through a fine mesh or cheesecloth. Cool before storing in the fridge (up to 5 days) or freezer (up to 6 months).
For the Instant Pot
- Roast bones at 400°F (200°C) for 30-45 minutes for deeper flavor (optional).
- Place bones and all ingredients in a large stockpot. Add vinegar and cover with cold water.
- Pour in cold water until it reaches about 1 inch below the max fill line.
- Let it sit for 30-60 minutes (optional) before turning on the heat-this helps with nutrient extraction.
- Lock the lid of your Instant Pot. Press "Pressure Cook" or "Manual."
- Set to "High Pressure" for 120 minutes.
- When the cook time is complete, select "low pressure" for 120 minutes.
- Allow the pressure to release naturally (about 20-30 minutes) for best results.
- Strain broth through a fine mesh sieve or cheesecloth. Let cool, then refrigerate (up to 5 days) or freeze (up to 6 months).
Notes
- Use enough water to cover your bones by about one inch. This ensures your broth isn't watered down and will congeal at room temperature.
Learning how to make bone broth at home is a simple way to enjoy all the nourishing benefits without the premium price tag. With just a few quality ingredients and some patience, you can create a delicious, nutrient-packed broth perfect for sipping, cooking, or boosting your health. Give this recipe a try and savor the rich flavors and wellness perks of homemade bone broth-your body will thank you!
Try Your Homemade bone Broth in:

Looking for more kitchen staples? Check out:


I just made this broth and couldn't be happier with it. We are coming into soup season when I use alot of chicken broth and can't wait to use it. I used the crockpot method and added rosemary sprigs and some green onion stalks.