This post contains affiliate links. Please read our disclosure policy.
Want to learn how to make sourdough starter but don’t know where to begin? This beginner-friendly, step‑by‑step guide walks you through feeding and growing your starter from scratch—and includes a free printable checklist to make the process even easier!

Table of Contents
Sourdough has become its own world for home bakers over the last few years. Even though it’s not a new baking method, some people are still confused about the concept of how to make sourdough starter.
I used to be one of those people.
I tried to learn about sourdough years ago and could NOT understand what a sourdough starter was, let alone how to make sourdough starter.
I was intimidated by the process of starting my own starter, but was too stubborn (and cheap) to buy one online.
What did “feeding” mean? What was “discard” and doesn’t that seem wasteful?
I needed someone to explain it to me as if I were five. If that feels familiar, you’re in the right place.
This is a safe space for beginner sourdough bakers. I’m going to explain it to you as if you were five without any snarky remarks. I’ll define all the terms and walk you through the entire 7-day process. And then, if you fill out the form below, I’ll email you a FREE checklist you can put on your refrigerator that tells you exactly what to do and when to do it.
Easy peasy lemon squeezy.
(Plus it’s pretty. We like pretty.)
What is a sourdough starter?

Some people’s journey of learning how to make sourdough starter begins and ends with this question.
Allow me to answer it for you.
A sourdough starter is a naturally fermented mixture of flour and water that captures wild yeast and beneficial bacteria from the environment. That means that your sourdough starter will have bacteria unique to your environment, making it different from everyone else’s. Neat, right?
Over time, this living culture becomes active and bubbly: the key ingredient that makes sourdough rise without the need for commercial yeast.
Unlike store-bought yeast, which is fast-acting and single-use, a sourdough starter is self-sustaining. Once established, it can be fed with flour and water and used over and over again for years, even passed down like a kitchen heirloom!
That’s the kind of thing brides need at their wedding showers.
When you feed your starter daily with fresh flour and water, it becomes strong enough to leaven bread (make it rise) and adds that signature tangy flavor and chewy texture that sourdough is loved for.
A common confusion around sourdough starter is that you’ll pour the starter into a loaf pan, stick it in the oven, and be rewarded with bread.
That’s not quite what happens.
Sourdough starter is the leavening you will add to your favorite baking recipes in place of conventional yeast. It’s an ingredient in the recipe, not the recipe itself.
Is sourdough Starter hard to Maintain?
No, once you’ve learned how to make sourdough starter, it is not hard to maintain.
There’s propaganda floating around (probably from the yeast companies) that sourdough starter is hard to maintain. They say it’s like having another kid to take care of.
Speaking as a mama to two very small children, I find this hilarious.
Sourdough starter is the chillest living thing in my house because I decide when to feed it (more on that later).
So, if the rumor that sourdough is hard to maintain is what’s holding you back from learning how to make sourdough starter, don’t worry about that. As with most things in life, sourdough is only as difficult as you make it.
What You Need When Learning How to Make Sourdough Starter
Getting started with how to make sourdough starter is super simple! You only need a few basic tools and ingredients you probably already have in your kitchen:
- Flour – All-purpose, whole wheat, or a mix of both work well for building a strong starter. I prefer organic flour to reduce our exposure to pesticides, but use what’s available to you.
- Water – Use filtered or dechlorinated water. Tap water with chlorine can slow down or kill the natural yeast.
- A clean glass jar or container – A wide-mouth mason jar or similar glass container works best so you can easily stir and observe your starter.
- A spoon or spatula – For mixing your flour and water together each day.
- A breathable cover – Use a clean cloth, paper towel, or coffee filter secured with a rubber band to let air in but keep dust out. Alternatively, a loose-fitting lid also works.
That’s it! No fancy tools required, just a bit of patience and a warm spot on your counter.
Why Water Matters for Sourdough Starter
This is the element that can stop bakers in their tracks when learning how to make sourdough starter.
Using filtered or dechlorinated water is important when learning how to make sourdough starter because chlorine and other chemicals in tap water can inhibit or kill the natural yeast and bacteria you’re trying to cultivate. These wild microbes are what make your starter bubble, rise, and eventually help your bread rise too — so you want to give them the best environment to grow.
If you don’t have a water filter, let tap water sit out uncovered for 12–24 hours before using it. This allows most of the chlorine to evaporate naturally.
Sourdough Terms explained:
One thing that stands in the way of potential sourdough bakers learning how to make sourdough starter is the terms that experienced bakers forget to define.
I promised to explain it to you as if you were five.
Here we go:
What Does “Feeding” Sourdough Starter mean?
Feeding your sourdough starter means giving it a 1:1 ratio of flour and water. For all intents and purposes, your sourdough starter is alive (and very well behaved). Therefore, like all living things, it gets hungry (but never whiny). To keep it alive and healthy, you have to feed it.
Rest assured that daily feeding is only required for starting your sourdough starter, not maintaining it. Once you’ve learned how to make sourdough starter, you’ll be a master at feeding your little starter (on your terms!).
What does “discard” mean in Sourdough Starter?
Discard means to pour out part of your starter. You are literally discarding it from the original starter.
I know that feels wasteful, but only if you discard it into the trash! This was something I struggled with when learning how to make sourdough starter.
Be sure to save your sourdough discard to make tortillas, biscuits, cookies, and many other sourdough starter recipes.
How to Make Sourdough Starter (Day-by-Day Instructions)
Learning how to make sourdough starter at home takes just a few minutes each day, and after about a week, you’ll have a healthy, bubbly culture ready for baking. Here’s exactly what to do, step by step:
Day 1: Mix It Up
- In a clean glass jar or container, combine:
- 1 cup of flour
- 1 cup of filtered water
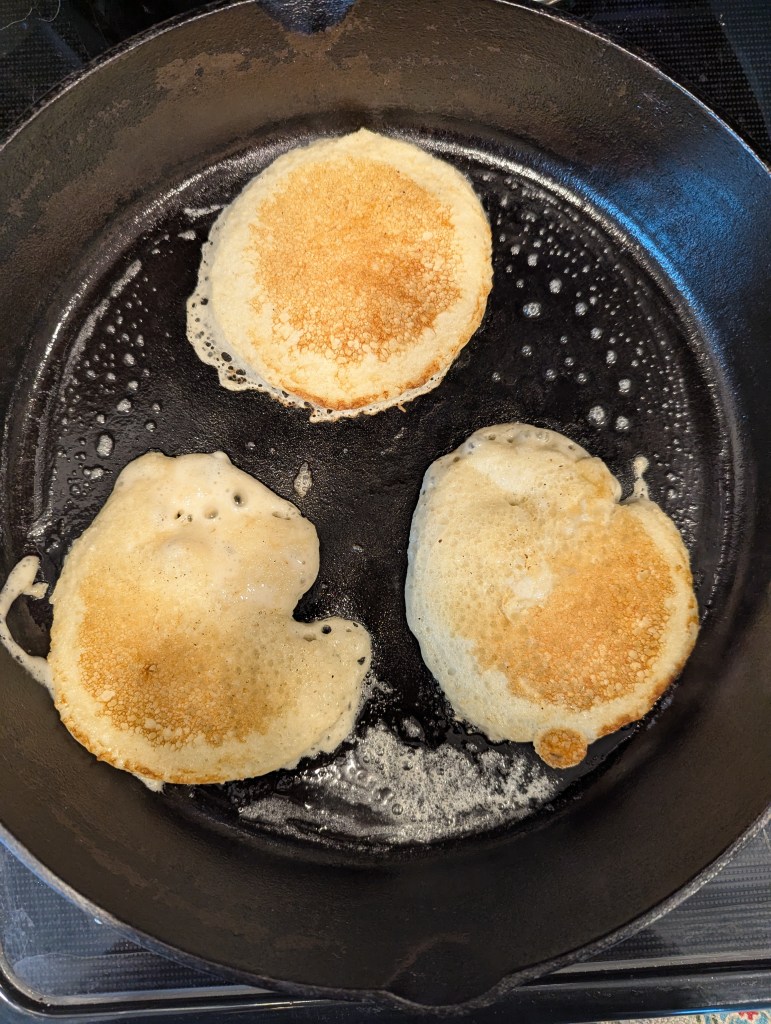
- Stir well until fully combined. The mixture should be thick and pasty, like pancake batter.
- Loosely cover with a cloth, paper towel, or lid (not airtight).
- Leave it at room temperature (ideally 68–75°F) for 24 hours.
Tip: Place your starter somewhere warm but not hot — like on top of the fridge, inside a turned-off oven with the light on, or on top of a heating pad set to low (my favorite!).
Day 2: First Signs of Life
- You might see a few bubbles or a slight rise — or nothing yet (totally normal!).
- Discard half of the mixture (about 1/2 cup).
- Add:
- 1/2 cup of flour
- 1/2 cup of filtered water
- Stir well, cover loosely, and let it sit in a warm place.
Day 3: Bubbles & Aroma
- Your starter may begin to smell slightly sour or yeasty — this is a great sign!
- Discard half again.
- Feed with:
- 1/2 cup of flour
- 1/2 cup of water
- Stir and cover as before.
Day 4: Getting Active
- By now, you should notice more bubbles and maybe some rising and falling throughout the day.
- Repeat the feeding:
- Discard half
- Add 1/2 cup flour + 1/2 cup water
- Mix well and keep at room temperature.
Day 5: Almost There
Keep watching for signs of strength: doubling in size and a consistent smell.
Your starter should be rising more predictably and smell pleasantly tangy.
Continue the same routine: discard and feed with 1/2 cup flour and 1/2 cup water.
Day 6: Feed TWICE
- At this point, your starter may be doubling in size within 4–6 hours of feeding.
- If so, you’re very close to ready!
- Discard half, feed with the usual 1/2 cup flour and 1/2 cup water in the morning.
- Discard half, feed with the usual 1/2 cup flour and 1/2 cup water in the evening (about 12 hours later).
Day 7: Feed tWICE
- Discard half, feed with the usual 1/2 cup flour and 1/2 cup water in the morning.
- Discard half, feed with the usual 1/2 cup flour and 1/2 cup water in the evening (about 12 hours later).
- After feeding, check to see if your starter:
- Doubles in size within 4–6 hours
- Has a pleasant, slightly tangy smell
- Is full of bubbles
- Passes the float test (instructions below)
If yes, congratulations! You have now successfully learned how to make sourdough starter and have an active starter ready for bread, waffles, and more. If not, continue feeding twice a day for another day or two. Be patient; sometimes this can take extra time.
what is the Float Test (and Why Does it Work)?

The float test is a simple way to check if your sourdough starter is strong and ready to bake with. It’s the crowning jewel of your how to make sourdough starter journey.
How to Do It:
- After feeding your starter, wait until it’s at peak activity — when it has doubled in size and looks bubbly and airy.
- Gently spoon a small amount (about one tablespoon) into a glass of room temperature water.
- If it floats, your starter is ready to use. If it sinks, it likely needs more time, feeding, or strength.
Why It Works:
The float test works because an active starter is full of carbon dioxide bubbles produced by wild yeast during fermentation. These gas bubbles get trapped in the gluten network, making the starter light and airy — buoyant enough to float in water. A dense or underfed starter won’t hold enough gas, so it sinks.
The float test is most reliable within 4–6 hours after feeding, when your starter is at its bubbly peak. Don’t test it right after feeding or if it’s been sitting too long.

How to use this Guide
I created this step-by-step printable to make your life easier when learning how to make sourdough starter. Once you’ve received the guide in your email, print it out and hang it on your refrigerator or on the cabinet over your flour tin. Then, follow the day-by-day instructions and check them off as you go!
I included all of the important how to make sourdough starter terms on the second page so you can consult them whenever you need to.
Easy. Peasy. Squeezy.
If you run into any hiccups, come back to this how to make sourdough starter post and scroll through the frequently asked questions below. I’ve covered just about every hurdle you might encounter.
How to use Active sourdough Starter
Once you’ve completed this how to make sourdough starter guide, your sourdough starter is active and bubbly and passes the float test, you’re ready to bake! A few of my favorite sourdough recipes are:
Sourdough Discard Recipes
You’re going to have a lot of sourdough discard after completing this how to make sourdough starter guide. It can feel wasteful pouring out all of that flour and water, but do not throw it away! With sourdough discard you can make:
How to Know Your Starter Is Healthy
A healthy sourdough starter is full of life, quite literally! Here’s what to look for as it matures:
- Bubbles: Visible bubbles throughout the starter and on the surface are a great sign of yeast activity.
- Rising and falling: Your starter should roughly double in size a few hours after feeding, then slowly fall as it “gets hungry” again.
- Pleasant smell: It should smell slightly sour (like hooch), tangy, or yeasty — not rotten or foul.
- Stretchy texture: When stirred, a healthy starter feels elastic, like thick pancake batter.
- Float test: If a spoonful floats in water, it’s likely active and ready to use.
If you’re not seeing these signs by day 7, don’t panic — some starters take up to 10–14 days to fully develop.
Tips for Success
Creating a sourdough starter is simple, but a few smart habits will set you up for success:
- Be consistent: Feed your starter around the same time each day to build a reliable rhythm.
- Use filtered water: Chlorine in tap water can harm your wild yeast — filtered or dechlorinated water is best.
- Stick with one type of flour (at least early on): Whole wheat or unbleached all-purpose flour works great.
- Keep your jar clean: Wipe down the sides as needed and always use clean utensils.
- Be patient: If it’s not bubbling by day 4 or 5, that’s normal. Keep going — it’s coming!
How to Create a Warm Environment
Sourdough thrives in a warm, stable environment — ideally between 68–75°F (20–24°C). If your kitchen is cooler, try one of these tricks:
- Inside the oven with the light on (but oven OFF) — this creates a gently warm chamber.
- On top of the fridge — a naturally warmer spot.
- Inside a microwave (turned off) with a mug of warm water next to the jar.
- Use a proofing box or yogurt maker if you have one.
- On top of a heating pad set to low– (my favorite!)
Avoid placing your starter near cold windows, air vents, or in direct sunlight — all of which can mess with fermentation.
Common Mistakes to Avoid
Even though starters are low-maintenance, here are a few common beginner missteps to watch out for:
- Using chlorinated tap water: It can kill off the wild yeast and slow fermentation.
- Sealing the jar airtight: Your starter needs airflow — always use a breathable cover or loose lid.
- Skipping the discard step: Not discarding will lead to too much buildup and a sluggish starter.
- Switching flours too often: Consistency helps your yeast culture grow strong.
- Expecting perfect results on day 3: Starters take time — slow growth is totally normal early on.
- Overfeeding too early: If your starter hasn’t shown signs of life yet, feeding too often can dilute natural yeast.
Maintaining Your Starter Long-Term
Once your sourdough starter is active and reliable, you can easily keep it going for years — here’s how:
If You Bake Often (3+ times/week):
- Keep your starter at room temperature
- Feed it once per day with equal parts flour and water
If You Bake Occasionally:
- Store your starter in the fridge and feed it once per week
- When you’re ready to bake, take it out, feed it, and let it sit at room temp for 4–8 hours before using
Forgot to feed it?
- A neglected starter can often be revived! Just discard the top layer, resume feedings, and give it a few days to bounce back.
FAQS
Can Sourdough Starter go Bad?
Yes, sourdough starter can go bad — even though it’s a pretty hardy and self-protecting culture. Here’s how to know when something’s wrong versus when it’s just behaving normally.
Normal Signs (Not Bad)
These are common and usually harmless:
- Hooch (grayish/brown liquid on top): Just alcohol from fermentation — stir it back in or pour it off.
- Strong sour smell: Normal. Can smell vinegary, yeasty, or even a little like nail polish.
- Discoloration from flours: Some flours (like rye) can make the starter look darker or streaky — not a problem.
Signs Your Starter Has Gone Bad
| Sign | What It Means |
|---|---|
| Pink, orange, or red tint | Bad — often indicates mold or harmful bacteria. Discard. |
| Fuzzy mold (green, black, pink, etc.) | Contamination — toss it out. |
| Rotten smell (like decay, vomit, sulfur) | Something’s gone wrong. Discard. |
| No bubbles/activity after feeding for several days | Could be dead (especially if kept too hot or frozen). Might be salvageable with multiple feedings. |
| Black liquid or crust after long neglect | May still be revivable, but only if there’s no mold. Scrape the top and feed several times. |
Can You Revive a Dead Starter?
Sometimes, yes — if there’s no mold or odd colors:
- Scrape off any discolored top layer.
- Take a small bit from the center.
- Feed it with fresh flour and water (1:1:1 ratio by weight).
- Repeat 2x daily for a few days.
Can you Freeze Sourdough Starter?
Yes, you can freeze sourdough starter, and it’s a great way to preserve it if you’re taking a break from baking. While freezing does slow down or temporarily halt microbial activity, the yeasts and bacteria can survive and bounce back with proper revival.
Why is My Sourdough Starter not Rising?
If your sourdough starter isn’t rising, it’s usually due to temperature, feeding balance, flour quality, water, or simply that it’s still young. But don’t worry, hope is not lost!
A few things to check for:
- Too cold: Starters thrive at 75–80°F. Below 70°F, fermentation slows dramatically. Move it somewhere warmer.
- Wrong flour: Bleached or low-quality flour can stall activity. Try unbleached all-purpose, whole wheat, or rye for a few feedings.
- Feeding imbalance: A starter that’s too thin can’t trap gas, and overfeeding can dilute yeast strength. Aim for a 1:1:1 ratio by weight (starter : flour : water).
- Chlorinated water: Tap water may inhibit yeast. Use filtered or dechlorinated water.
- Too young: Most starters take 7–14 days to reliably double.
- Overfed or underfed: Weak starters need consistent, balanced feedings to build strength.
- Signs of contamination: Mold (pink, orange, black, or fuzzy spots) means it’s time to start over.
If your starter still isn’t rising after adjusting these factors, I walk through detailed diagnosis and recovery steps in this guide:
Why Is My Sourdough Starter Not Rising? (7 Common Reasons + Fixes)

You Just Learned How to Make Sourdough Starter!
I know that learning how to make sourdough starter feels intimidating at first, but with a little patience and the right steps, anyone can create a thriving starter from scratch. I believe in you!
Whether you’re dreaming of baking artisan loaves or just curious about the magic of wild yeast, this process is both rewarding and surprisingly simple. Don’t forget to grab your free printable step-by-step guide to keep on hand as you mix, feed, and watch your starter come to life. Happy baking!


How many loafs can the starter make if you’re just making one?
Depending on the recipe, you should be able to make one loaf of bread with your starter, but if you don’t have enough, just feed it one more time without discarding, and you should have plenty 🙂
Can you use distilled water?
Hey Abby! You can use distilled water, but it’s not ideal because all of the minerals have been removed so it will weaken the starter. Filtered water is best, or you can let tap water sit on the counter uncovered for 24 hours to let the chlorine evaporate.
What does it take to make this starter a “sweet sour dough bread?”
Hey Alice! To turn your sourdough into a sweet sourdough bread, use it in recipes like our sourdough cinnamon rolls or cinnamon sourdough bread 🙂
This is great, followed your instructions to the letter, have a thriving colony, looking forward to great baking this week
Thanks Ian
I’m so glad to hear it! Happy baking 🙂
My filtered water comes from my fridge and it is cold, can we use cold water?
Cold environments aren’t good for fermentation. If you could let the water come to room temperature before using it in your starter, you will see much better results 🙂
Thank you, also if I am only making a loaf a week and keep my starter in the fridge, when I feed it once a week do I have to leave it out at room temp or do I feed it and put back it immediately back in the fridge?
When keeping it in the fridge do you still keep it loosely covered? Was wondering if it takes on the smell of other foods in the fridge?
I’m looking forward to getting started.
Don’t put your starter back in the fridge directly after feeding it. Let it sit at room temperature for a few hours so it has time to ferment, then move it back to the refrigerator. You can cover it more tightly once it’s in the refrigerator. I don’t have trouble with it taking on the smell of other foods, as sourdough starter has a pretty strong smell itself. Hope this helps 🙂
Does the discard need to be used right away? How do you store the discard? Looking at your biscuit recipe for the discard, how do I get 1 cup when the discard is only 1/2 cup each day? Can I combine the discard from two days to make your biscuits? Once you have the active ready, how much do you use for a loaf?
Hey Anastasia! You do not have to use your starter right away, just pop it in the fridge until you’re ready to use it 🙂 Once your starter is active, you don’t have to discard. So, feed your starter without discarding, and you should have plenty to make biscuits or any other recipe. Even if your starter is active, you can use it for a discard recipe. And once the active is ready, follow the recipe instructions for how much to use. Keep feeding it until you have enough for a recipe. I hope this helps 🙂
Can I add all my discard together over a few days? To make like a bigger batch of pizza dough or something?
Instead of discarding the second day after starting can you put in another bowl and have 2 starters
YES! This is what I needed. Explain it to me as if I were FIVE! Thank you! After often thinking of doing sourdough, I was a wee bit intimidated. Now, I think I can do this. After all, how really hard can it be? Pioneers took starters with them in doggone covered wagons, right? So thanks to you, today is the day. I have everything I need already. Thanks again for the detailed plain-talk instructions.
Thank you for the great instructions, after multiple attempts, I finally have a viable starter!! Question, I only bake once twice weekly and I believe you mentioned to put starter in refrigerator. Do I cover with the breathable lid or something tighter?
Also, going on vacation for 3 weeks, should my daughter discard and feed weekly while I’m gone?
Thanks
Jerri
Hey Jerri! Congratulations! You can put a regular lid on your starter container- it doesn’t need to breathe in the fridge. If your daughter is willing to feed/water your starter once a week, that’s a great option. If not, you should be able to revive it when you get home. It might take a few feedings to get it going again, but if it’s sluggish, try giving it some whole wheat flour and it should be ok 🙂
Where should one leave the discard at? Should it be stored in the refrigerator or left on the counter?
Can I use purified water for the starter feed?